
For a while now I have been wanting to dive into all the various acrylic paint pouring techniques there are out there to try. There are so many that I haven’t explored yet!
When we are talking about the pouring technique, we are talking about the method used to get the paint on the canvas.
It determines whether you’re going to layer your paint in a cup, squirt it from a bottle or even swing it from a trapeze! Yes that IS a thing!
I pretty much always do a dirty pour flip cup or a ring pour. This is starting to get boring to me so it’s time to learn all the fundamental pouring techniques.
There are a ton of common acrylic pouring techniques to try as well as an ever-increasing number of creative unique ones too! With tons of new acrylic pouring techniques popping up all the time it’s hard to keep up with it these days!
I’m certainly going to be trying to cover as much of it as I can!
It is in these techniques where a lot of the creativity lies when it comes to acrylic pours. That AND how you mix your paints.
These two things while seemingly simple can become quite complex once you begin to get it all down. Thus getting original, unique, and amazing results every time!
I must warn you though, this takes practice, and getting quality results isn’t quite as easy as some might make it look.
Let’s just start by making a list of the most basic and common pour techniques you will find across the internet!
Here is a quick video I made while writing this to give some of these techniques a try.
Common Acrylic Pouring Techniques
Here are the most basic acrylic pouring techniques all beginners should give a try.
I’ve done my best to include all of the most top searched techniques as well as the ones I have just observed as popular.
Some of these are easier than others. As you can see from the above video I have tried the swipe technique twice and messed it up both times.
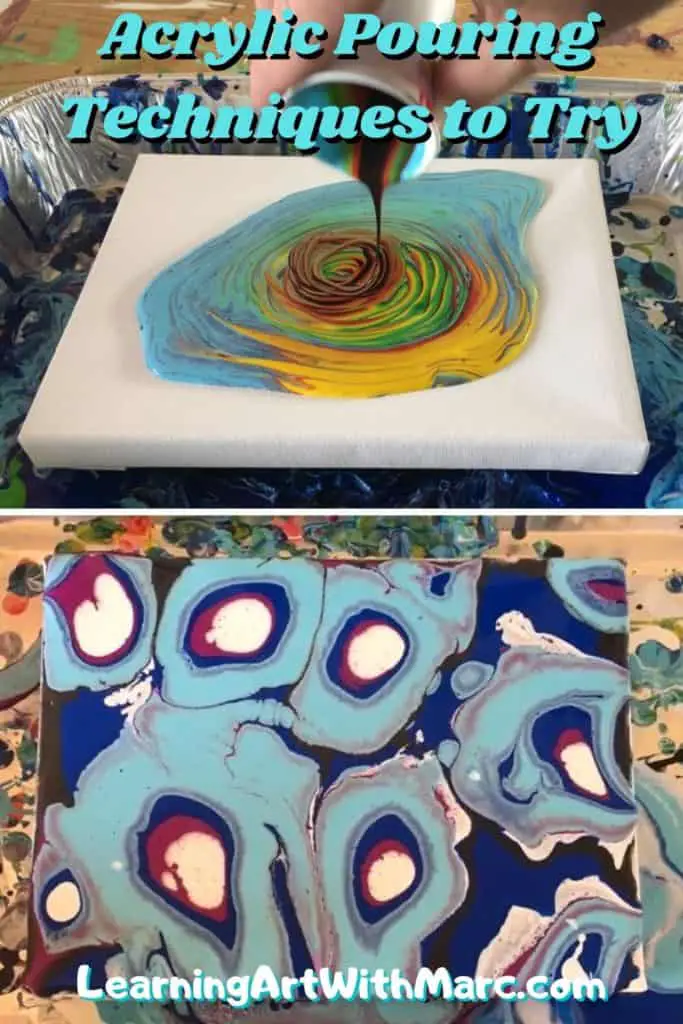
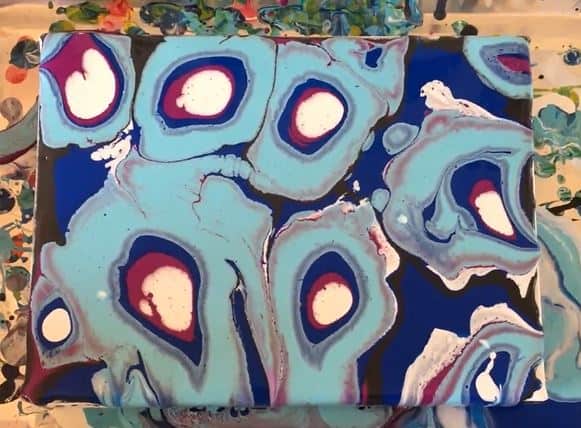
The ring pour may be one of the easier ones to accomplish which is part of the reason why I put it at the top of the list. That and I have the most experience with this method.
The Ring Pour or Swirl Technique
This is a simple pour to do that gets pretty beautiful results. You start by layering your paint into one cup.
Then you pour it slowly in the center of the canvas. Pouring in circles letting the rings expand out.
Then you tilt the canvas back and forth. Attempting to keep as much of the cool designs as possible while also getting the entire canvas covered.
I’ve done quite a few of these but this one immediately became a new favorite.
There are actually a number of other ways to do the ring pour. Two others that I am currently aware of.
There is the Traveling ring pour. This is pretty much what it sounds like.
Instead of pouring in just the center of the canvas you gradually move your swirls across the canvas.
There is also the paint kiss pour. This is where you layer your paint in two different cups.
You want the colors in one cup to contrast against the colors in the other cup.
Then you pour them both at the same time in one stream in the center of the canvas. Thus resulting in a ring effect like we got when we moved the cups in circles.
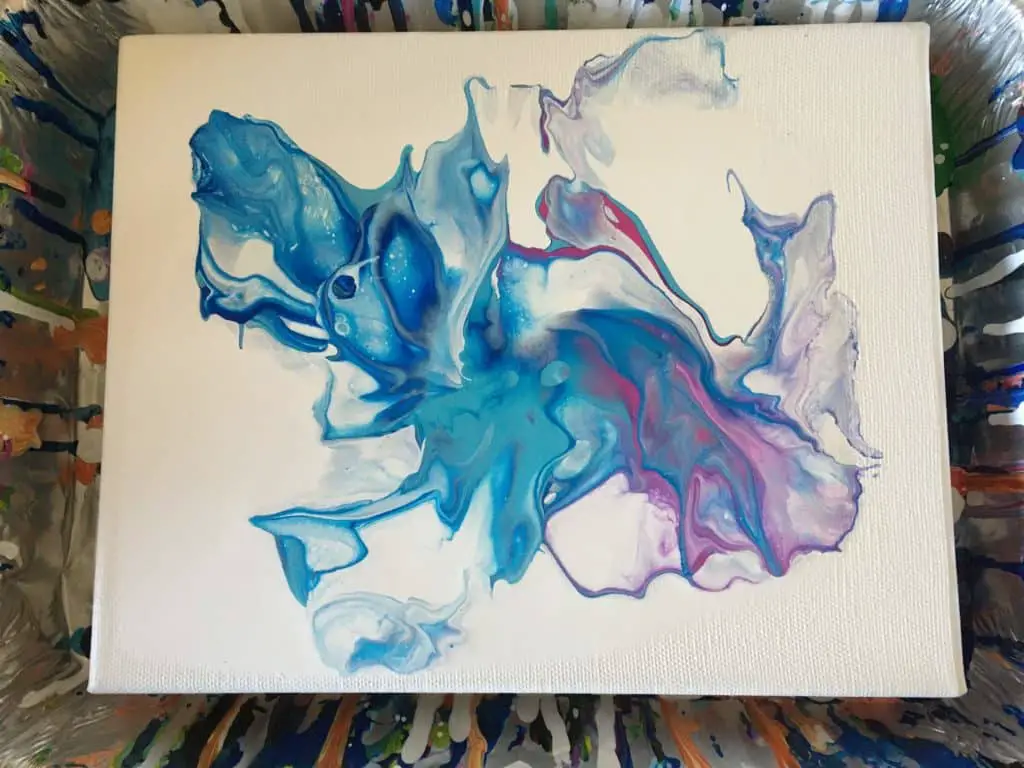
The Swipe Technique
The swipe technique is when you take something with a straight edge and SWIPE it across the canvas in a particular direction.
This tool can be a piece of cardboard, plastic wrap, paper towel, or maybe even a palette knife.
You generally want to lay your paint out in layers and start from one side and lightly drag your tool to the other side.
You can also start in the middle and work your way out.
So far I have tried this technique twice and failed to pull it off both times. It is certainly one of the harder ones to get right. At least it has been for me.
This picture above is of the first attempt I made at doing the swipe technique. While it does look cool what you cant see is that there was purple and a lot of black underneath all of this that I thought would come through but didn’t.
I don’t think my mixtures were right to get the effect that I wanted. I may have made a number of mistakes.
I’m going to have to do more of these and come back to update this section when I get better at them.
The Puddle Technique
The puddle technique is where you pour one color at a time into puddles on the canvas.
It’s always good to do a base coat before any pour as it helps the paint flow.
Once you pour your puddles onto your canvas you then tilt your canvas around and let the magic happen!
You could also take something like maybe pop-sickle stick and drag it through the centers of each puddle to help make some cool patterns before you start to tilt.
If you vary you mixtures too you will get different effects. So while I recommend starting with a 3 to 1 ratio of medium to paint, I also recommend experimenting a bit too.
Experimenting is half the fun!
Related Articles:
- How To Do an Acrylic Pour
- Common Acrylic Pouring Problems You May Encounter
- Blue and Red don’t ALWAYS Make Purple! (How To Mix Purple)
- What Makes a Good Abstract Painting? The Principles of Art
- Abstract Acrylic Painting Techniques: Tools & Techniques For Beginners
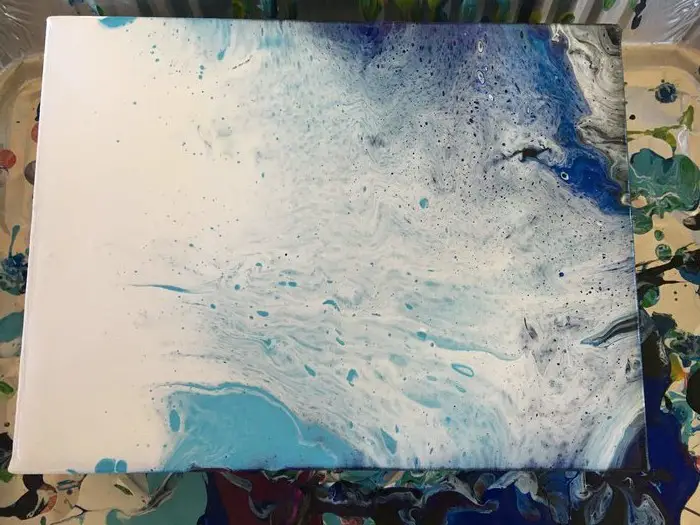
The Acrylic Wave
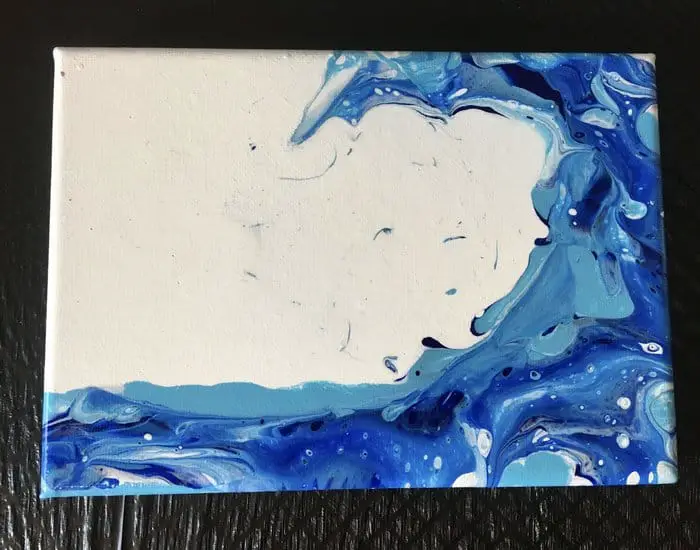
The acrylic wave is a bit like the swipe technique but swiped in the shape of a wave.
You start by putting down a nice layer of white. Then you pour various blue colors in lines.
Some people only pour the colors at the bottom and then pull them up with the swoop of the wave. Some put colors where they plan to bring the wave too.
Either way works really.
There are options when it comes to what you use to make your wave as well.
The one thing to be aware of is that when you do lift your tool off the wave try not to drip any of it in the white area of the painting. If you do try and fix it to be all white.
You can see in the picture above where I made that mistake myself.
Baloon Technique
This is a technique where you use a balloon in various ways to press the paint into the canvas in various ways.
You generally want to cover the canvas in a base coat of white or black. It seems to be far more common to use white for this.
Then you either put your colors in puddles on the canvas or perhaps a puddle on your palette or plate.
When you press the balloon into the puddle of colors, you get some pretty cool effects this way with the way the colors mix on the curvature of the balloon.
The Dutch Pour Painting Technique
The dutch pour painting technique is when you start with a layer of white or black paint, then you pour your colors into it where you want them.
It sort of depends on your canvas and the look your going for. If you want one where the colors look like they bloom from the center then do a puddle pour in the center of your canvas.
From what I have observed thus far it looks like adding more of your background color around where your puddle pour is seems to be a good idea.
Then they hit it with a heat gun or hairdryer. The blowing air causes the paint to move and blend in cool ways.
While researching this I went ahead and ordered a Workpro heat gun to give this technique a try in an upcoming YouTube video.
Once I have some experience with it I’ll have to come back and update this section.
