
When it comes to painting projects for beginners doing a silhouette painting is certainly one of the easiest projects you can try. At least it looks that way to me.
It is definitely something I have been wanting to try myself for some time now. In fact, there are more than a few different types of silhouette paintings I want to try my hand at.
So if you’re interested in these types of paintings as well, like I’ve done for galaxy paintings, I’m going to be documenting my process. In doing so I will provide you with a series of easy to follow steps so you can learn with me!
Sunset Silhouette Painting Project
To start with, I looked at a ton of sunset silhouette paintings on Pinterest.
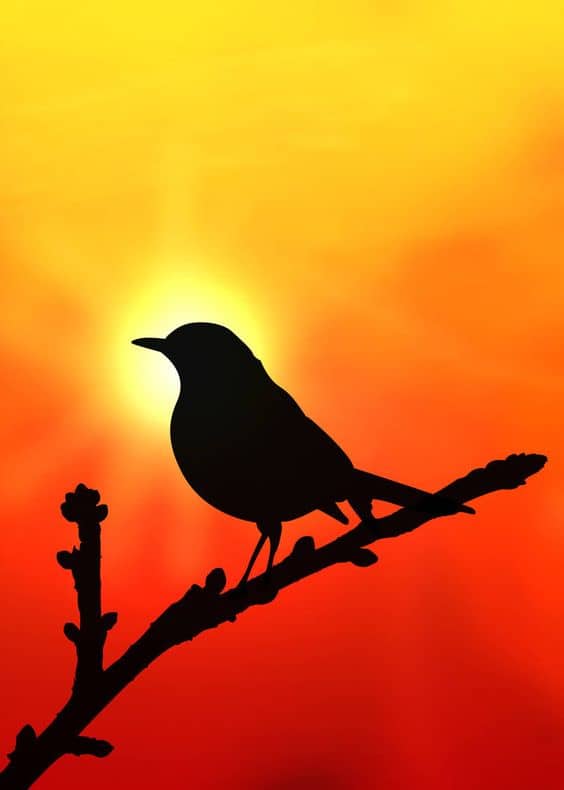
This eventually brought me across this picture here that I decided to use as my reference.
For this first silhouette project, I wanted to find something simple to start with. Which is part of the process I outlined on “How to Start Painting as a Hobby”.
As you can see from examining this picture, silhouette pictures like this comprise of two main elements.
They are basically just a background and a foreground. Add to this that our main subject is a bird and this makes for an easy project we both should be able to do.
Now, normally when I am trying something new like this I would start with a smaller canvas. This is another one of my methods on the “How to Start Painting” page.
This time I’m starting with a 10″ x 10″ canvas. You can use whatever size canvas you feel comfortable with. The process is still the same.
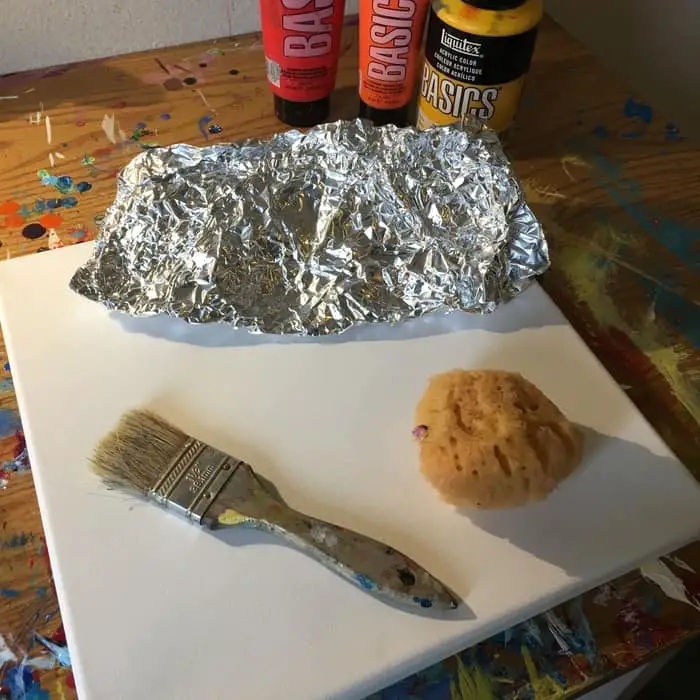
When it comes to the tools you use that is up to you depending on the sort of feel you want to go for. When I took this picture here I wasn’t quite sure if I was going to blend my background gradient with just the brush or whether I would use the sponge or foil instead.
The cool part is you could really use any of these options you see to get the job done.
Related Articles:
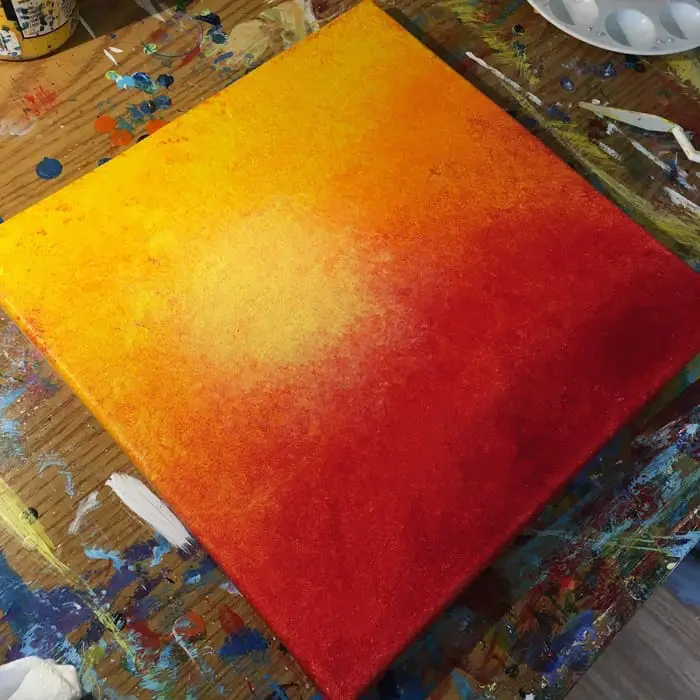
STEP 1: Create Your Gradient
In this first step, we just need to create a gradient of red at the bottom blending into orange and yellow as we go up.
So start by putting your paint on the canvas in those areas.
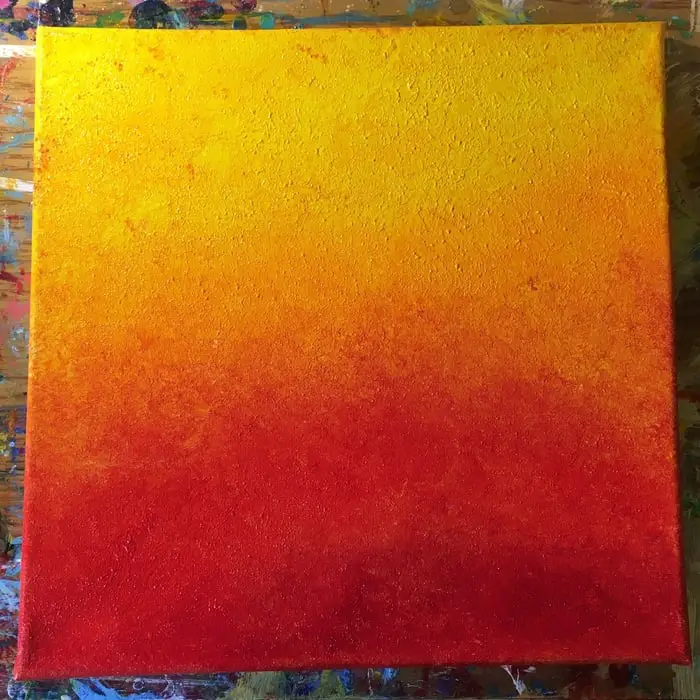
Then spread and blend them across the canvas attempting to get the transition from each color into the next smoothly. It’s ok if blending isn’t perfect.
This is where the foil or sponge comes in.
I used the sponge to get this blend and texture you see here.
For more on how to get a textured blend like this, check out this YouTube video I made demonstrating 4 different blending techniques to try!
Have fun with it! Experiment with the brush to see what textures you can get with that.
The tin foil will give you a nice blend with a different type of texture as well.
STEP 2: Add the Glow of the Sun
Mix your yellow and white together to create a couple of different shades of light yellow as shown here.
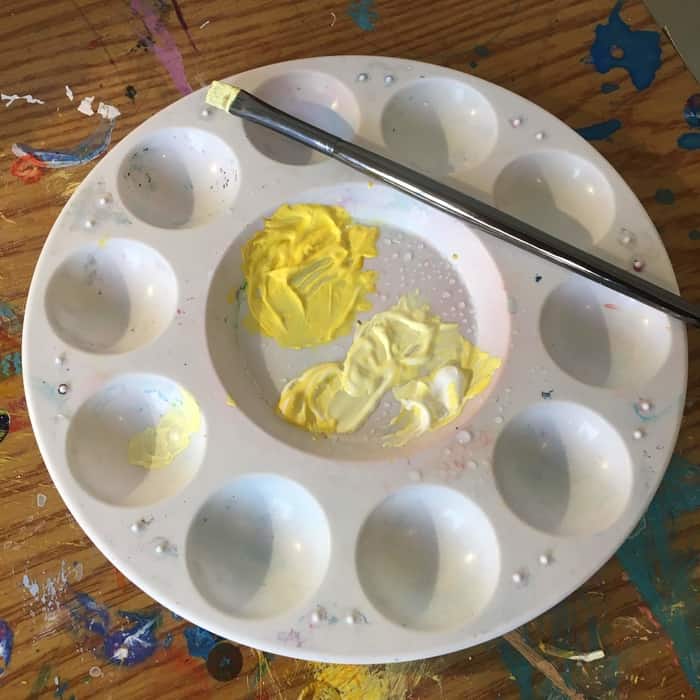
As you can see I’m using a small square-headed brush here. I have some white that is mixed with a tiny bit of yellow towards the bottom and some yellow that is mixed with white towards the top.
Once I have my colors I start by brushing some paint on the canvas in the area where I want the sun to go.
Then I take my sponge, which is a bit damp, and I start dabbing it outwards in a circle.
I’m keeping cognisant in my mind that I’m trying to create the glow of the sun. So I want it to be a light blend.
If you feel that maybe you put too much paint rinse your sponge and wring it out.
Then dab with a clean but damp sponge and it will help spread the paint out more and ensure it dries a bit more see-through than normal.
STEP 3: Use the Off White Yellow to Add Shine to the Sun
For this step, you want to use your white and mix just a bit of yellow into it. As shown in the previous picture in STEP 2.
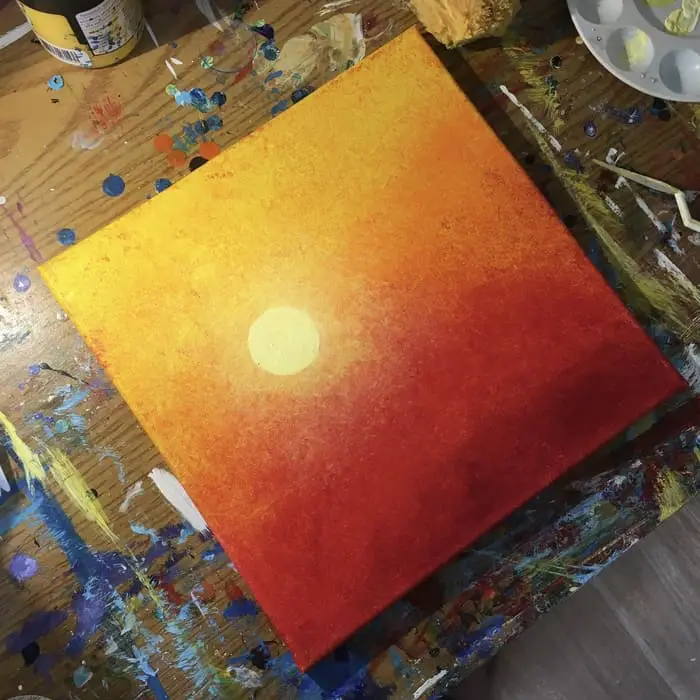
This step is pretty simple and straightforward.
As you can see you basically just need to make a circle in the center of where you placed your glow effect.
Hopefully, as you’re doing all of this you’re keeping in mind some basic rules of composition.
There are various things like the rule of thirds or the golden ratio to consider when you map out in your mind where things should go.
I will have to spend some time covering these subjects in more depth later.
- How To Paint a Sunset in 8 Easy Steps (Beginner Acrylic Painting)
- How To Paint Water (A Step By Step Guide)
- How To Paint Clouds: A Step By Step Exploration Of Cloud Painting
- How To Paint Bubbles (An Easy Acrylic Painting Project!)
- How To Paint A Moon Suspended In Space In 8 Easy Steps
STEP 4: Start Adding Your Bird Silhouette
If you scroll back up and take a quick look at the reference photo I used, you will see that the bird’s head lies in the center of the sun.
So I started at the head to make sure I got its placement correct and worked my way out from there.

Generally, I would usually look to start with the largest shape first. Which for the bird would usually be the body.
In this case, I felt the head was best to ensure the proper placement I wanted.
For this first layer, I recommend watering down your paint just a bit so that way the layer is light and transparent. This way if your placement or shape is off you can adjust it later.
This is something you’ll learn about when learning to draw from Brent Eviston’s The Art and Science of Drawing course on Skillshare. While taking this course and learning to draw one thing to do is to layout your shapes as lightly as possible.
This way you can make the necessary adjustments later when you have more confidence in where it should go.
STEP 5: Add Your Final Layers of Black Paint
This last step is as simple as it sounds. Now that you have your bird and branched laid out how you want it, you should feel much more confident about adding your final touches.
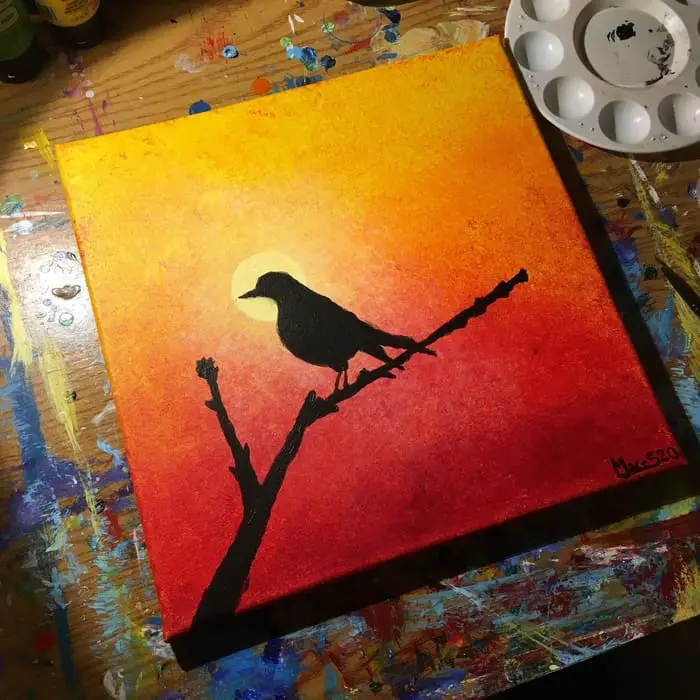
Darken up your shapes and refine them where needed.
For me, I had to refine the head and body slightly to get a better result. I also worked on making the branch a bit thicker and longer to fill out the canvas more.
For this layer, I didn’t water down the paint at all either. In fact, I did more than one layer to get it a nice dark silhouette.
I did a layer, let it dry, and came back to do another. You may want or need to do multiple layers as well to get it as dark as needed for that true silhouette effect.
This is really all there is to this project! Be sure to bookmark this page and come back from time to time as I will be adding a whole series of more silhouette painting projects for you to try!
