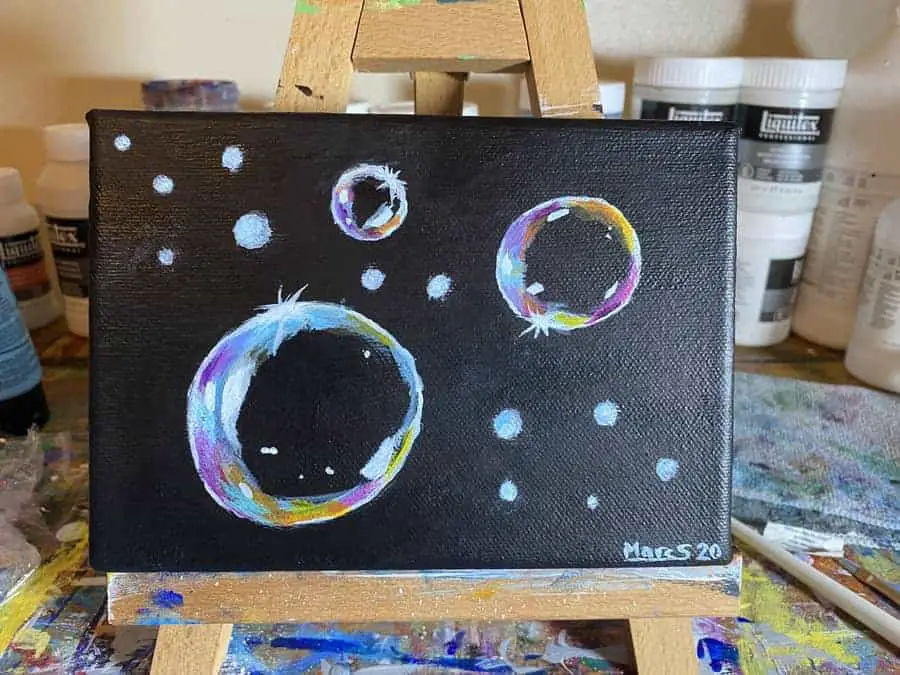
Can you draw or even trace circles? If the answer is yes to either then you can create a bubble painting!
There are a couple of different ways to approach a bubble painting. For the purpose of this painting, we are going to take the simplest route possible.
Personally, I want to practice my circle making skills so I’m going to freehand my circles but many people demonstrate doing this by tracing anything circular you might have.
If that is the best route for you then I encourage it but don’t let not having a stencil or something to trace stop you. You got this! Just remember to use your shoulder and not your wrist!
Whatever route you choose, you will learn a bit about circle making and sphere making in this proje
ct. It will help you to think about reflections and how light reflects off of rounded surfaces.
It also serves as good color blending practice too! With all the variations in colors you have to be careful
Related Articles:
Gather Materials and Prep Canvas
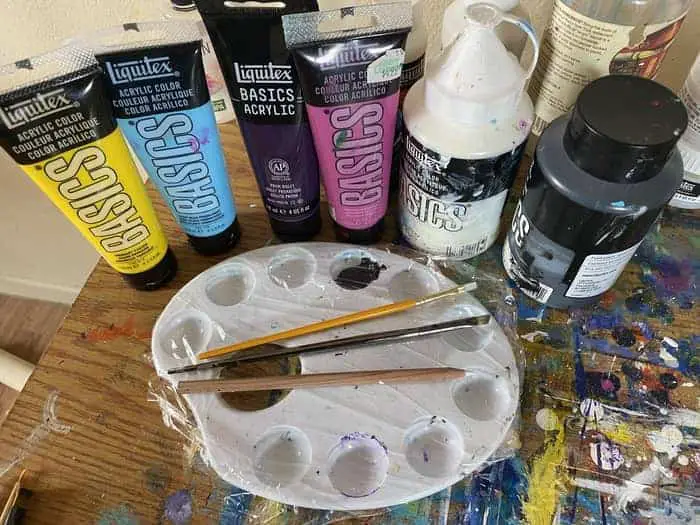
Before we get started, in my demonstration I’m going to be using a thick 5 x 7 Blick Premier Cotton Canvas from DickBlick. The thick canvases of this brand are called Gallery Profile.
If you like how these look and want some in your stock you can get them at a discount when you buy 10 or more here!
I prepped the canvas with several layers of Liquitex Gesso tinted with black. Essentially a gray primer really. It helps to make sure the entire canvas gets primed when you tint your gesso like that.
It was the first time I tinted my Gesso like that and I found it quite satisfying for some reason.
Most canvases come pre-primed but I like a few layers to help smooth out the surface a bit. This is really a personal preference and not totally required.
For the paints I will be using the Liquitex paints of:
- Ivory Black.
- Light Blue Permanent
- Medium Magenta
- Prism Violet
- Primary Yellow
For my paintbrushes, I used a combination of small brushes. Mostly the one with a diagonal edge. I’m not entirely sure what that particular brush is called just yet.
Every once in a while I would use a brush of a similar size with a straight edge.
What matters is choosing the right brush is finding the brush that you are comfortable using getting a sharp edge or blending some of our colors together.
I also have a white colored pencil for drawing my circles with. A lot of people choose to use a white acrylic paint pen as well. Check out this article to learn more about acrylic paint pens!
I’m a fan of working with what you have so whichever you have or are most comfortable with go with! Don’t let a lack of tools burst your bubble!
Paint Canvas A Dark Background Color
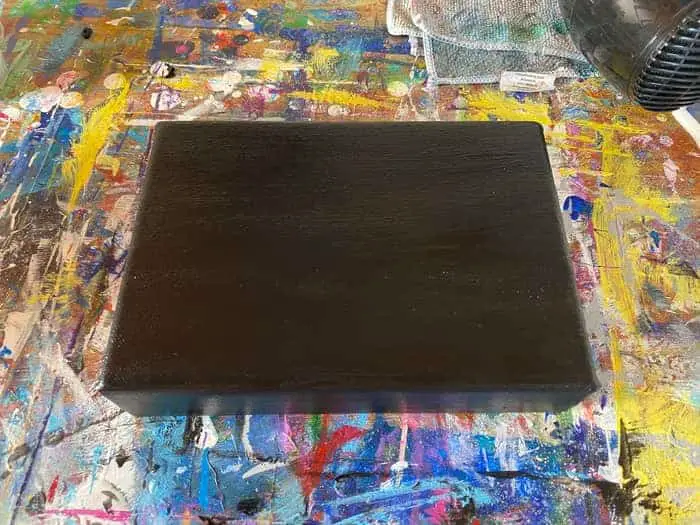
We start with the most basic and simple of steps, by painting the canvas a dark background color.
Most of the demonstrations I found go with black so I decided to keep it simple and go with that myself. I actually tried to mix in a dark purple but it’s so dark that it looks nearly black when it dries.
That’s dioxazine purple for you. It always dries way darker than I expect it to. So you can’t even tell that it’s in there.
You can use other colors as well. It’s entirely up to you on this one! Just keep it on the darker side of the spectrum so our bubbles will juxtapose nicely against it.
I did see other artists going with more abstract colors and colorful backgrounds. Some of them even drew their bubbles on top of acrylic pours. If that is what you want to go with then go for it!
Projects like this are a bit more free-flowing and for exercising your art skills while providing you with a bit of creative leeway.
Draw or Trace Your Circles In
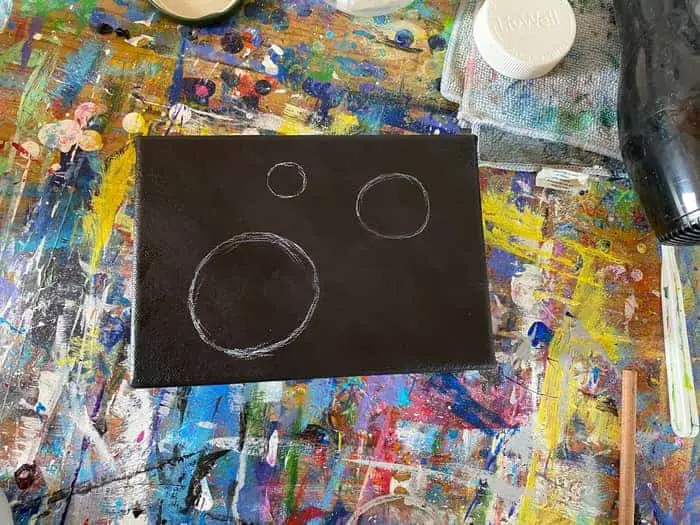
As I said earlier, I wanted to freehand mine in for practice and an added challenge! I drew them on with a white colored pencil.
Now is the time to draw your circles on too! If you have a hard time drawing circles freehand you can use anything circular to trace and still get great results.
Can you see why I wanted to practice my freehand circles? They still need some work. It’s a good thing I’m going to paint over them!
One of the keys to getting a good bubble is to have a sharp bright edge to the circle. This is one reason people will trace a circle with a paint pen.
It helps to get that sharp bright edge easily.
That said when you look at pictures of bubbles how often are real bubbles perfectly circular?
Some of them are weirdly balanced and lopsided. I honestly feel like a perfect circle isn’t the best way to represent a bubble but this is for the sake of practice and not realism.
This is one of those projects that is low hanging fruit. I want you to be able to finish it in whatever way is easiest for you. This way you can get the satisfaction of completing a painting and hanging it on your wall!
Either way works and I recommend going with what you feel most comfortable with. Which will make it easier for you to complete this project?
Once you draw in your circles go to the next step!
Paint Your Outlines
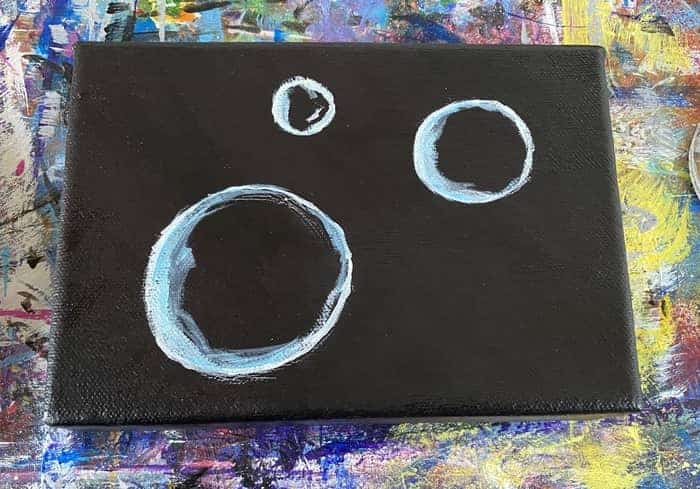
After drawing our circles out the next step is to start painting!
I used titanium white mixed with a bit of light blue permanent. If you’re like me and still learning you may be a bit messy in your approach still.
At least when going free hand like I’m trying.
Like I said, a lot of other demonstrations either trace or use stencils. As an example, Chloe Art shows an example of some sort of stencil she uses to make her bubbles.
Check it out in the video below!
These stencils she is using leave a finer and sharper edge on the bubbles. Just like when we use masking tape.
While she does hers with a stencil and a paintbrush others use the paint pens just as effectively to trace something.
If you’re courageous enough to go freehand, even if yours ends up messy like mine we will tighten it up with the next steps as we always try to do anyways.
I tried to make the outside edge a sharper white and then used a bit of the light blue around the curvature of one side to start giving it a bit more of that roundness we want.
After we add more colors and details we will come back to sharpen the bright reflective edges.
- Easy Galaxy Painting For Beginners
- How To Do an Acrylic Pour
- Silhouette Painting for Beginners
- Abstract Art Projects To Try
- How To Paint Clouds: A Step By Step Exploration Of Cloud Painting
Start Painting In Additional Colors
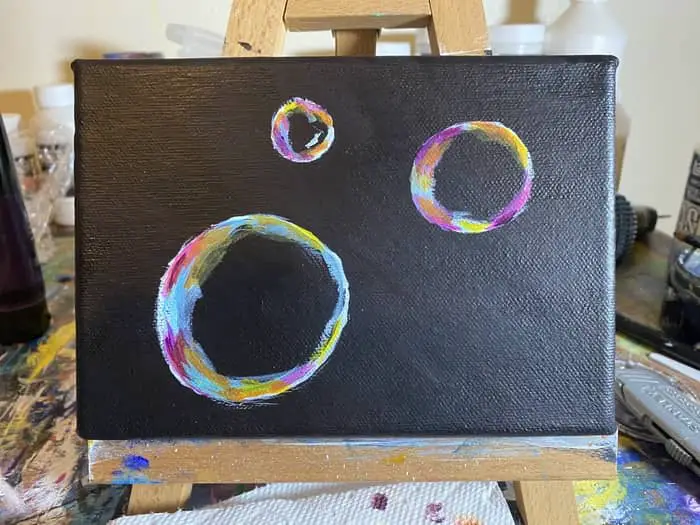
We all know bubbles are comprised of soap or some other chemical. As a result, they have various chemicals in them that often reflect different properties of light back at us.
Bubbles are a mixture of various colors of the spectrum. Often they are very rainbow-like in their coloration. That is, the parts of them that aren’t transparent anyways.
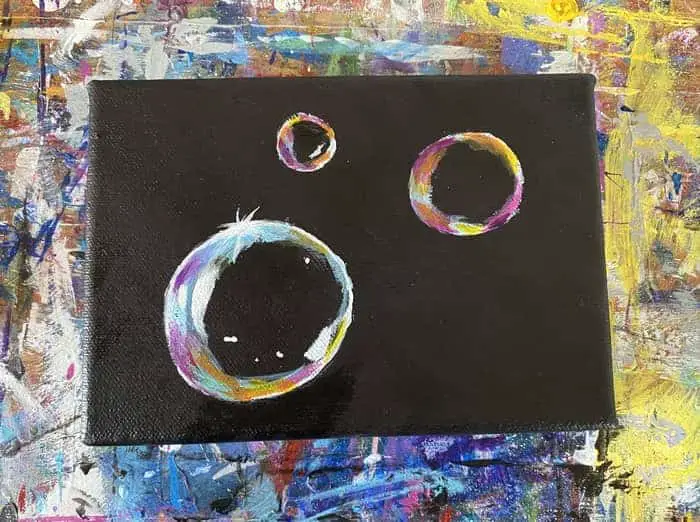
In this step we start adding in the rest of our colors around the edges of the bubble.
You will want to go a bit thicker and heavier on one side than the other. Try to think of a sphere as you are doing this as that is ultimately what we are trying to make right?
I didn’t really go in any particular order of colors when putting them down on the canvas. I just started laying them down until I started to see something that resembled a bubble.
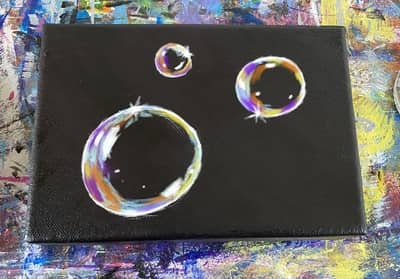
In all honesty, before I did this I loaded a picture into Procreate to practice how I was going to approach it digitally.
Here is what I came up with digitally before I started laying down what you see above.
Once I had some colors layered in procreate that looked good it gave me the confidence to take it to the canvas. Plus it also gave me a reference to use too.
If you have any digital means of doing this too you may find it helpful in guiding your direction on the canvas. Every time I do this I find it helps me out a lot in getting the results I want on the actual canvas.
At the very least you can use this guide as your guide ha ha! I mean it is one reason I’m leaving it here for you to find.
Add Reflections and Highlights To The Largest Bubble
In this step, focus on tightening up the largest bubble’s color’s and highlights.
Using my reference picture I made in Procreate in the last step I made some adjustments to some of the colors before I started adding in the brighter reflections of the bubble.
For the reflections, I liked how it looked in my reference picture so a sought to get the placement in similar places.
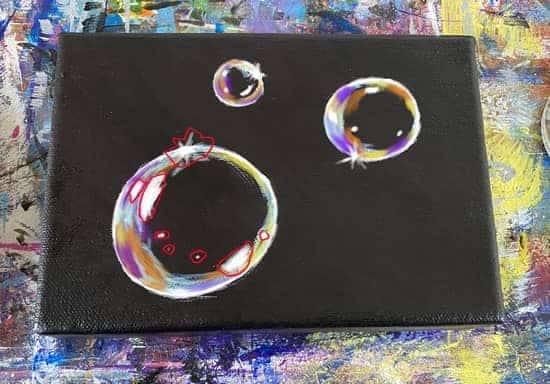
As you can see from my example here, I’ve outlined in red the spots I’m focused on.
Something as simple as adding in these little reflections of light really gives the bubble that round feel. It also gives the sense that there is a transparent surface there that we can’t see.
For this part I used titanium white tinted with just a bit of light blue permanent. Start by adding just a bit in the big main spots.
It helps to add just a bit at a time until you’re sure where the brightest part is going need to be. This helps ensure some parts still end up being a bit transparent while others are bright and reflective.
Now we just need to do this to the other two bubbles. Once we do that we will decide how to fill out the rest of the canvas.
I don’t know about you but all that empty space is going to bother me.
Add Reflections and Highlights To The Smaller Bubbles
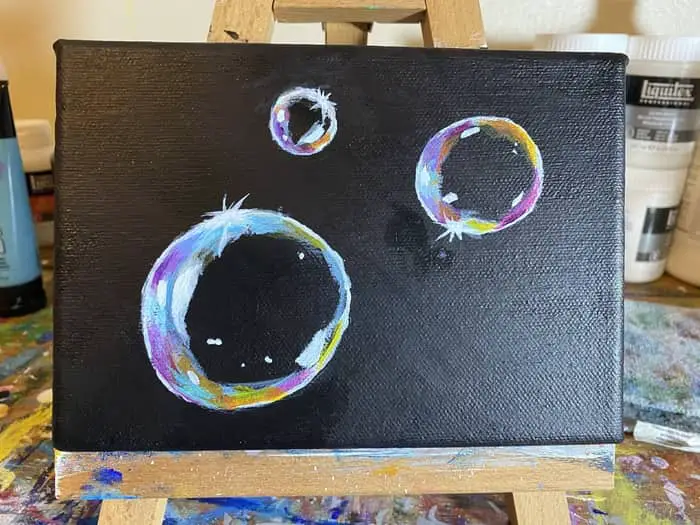
For this step we’re going to do the same thing to the other bubbles. Since they are smaller they should be pretty quick and easy to take care of.
Try to vary the spots you choose to put the reflections.
We obviously want each bubble to have some sort of individuality to them. We also want to think about how we can draw the viewer’s eye around the canvas.
My bubbles are placed in an intentional way and so are the flares of light on each bubble.
I’m not always thinking specifically about the principles of movement or rhythm but these sorts of principles tend to emerge when I’m thinking about if that feels right.
If you’re not familiar with the principles of art I wrote a brief piece about how they can be used in abstract art but they really are principles of all types of art.
You can read more about them over on this page here!
The flares on the bubbles are placed in a way that is intended to help catch the eye and pull it around the canvas.
That said, at this point in the process, our bubbles are starting to look pretty good! It still feels empty though.
There is one last thing I want to try adding.
Add-In Hazy Background Bubbles
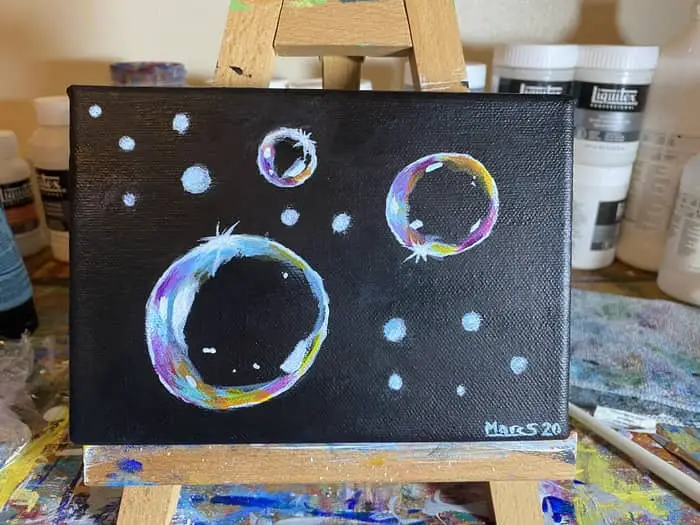
For the last step we need to decide what else to add in to help fill in the extra space.
I considered a few different things and this is again where having a way to brainstorm digitally is really helpful.
After some experimenting in Procreate I decides I was going to add in some hazy background bubbles.
To do this take your white light blue mix and put a tiny dot of paint on the canvas. Wash your brush off and then dry it off. Then go back to that dot and gently spread it in a circle.
This is what I did a little bit at a time to ensure it was a bit more hazy and transparent.
I did also use another technique I saw where you put the dot down and then smudge it out with your finger.
This can work pretty great if you don’t lift your finger off the canvas and put it back down. I made this mistake several times messing this technique up quite easily.
This was mostly because I’m working so small. This technique would probably work really well on a larger painting with larger background bubbles.
That is how I initially saw it being demonstrated.
Then there is the fact that we are trying to work on the background after the foreground. This really should be one of the earlier steps before even drawing the bubbles but it was a last-minute thought.
A smarter artist would have brainstormed that first!
We made it work though! Hopefully you made it this far with me and learned something along the way.
If you have and you found this guide helpful in creating your very own bubble painting feel free to share it with me on Instagram here!
I would love to see what you created! Either @ me send me a direct message or use the hashtag #ArtWithMarc!
Instagram is my behind the scenes where you can keep up to date with whatever is currently going on in the Art With Marc studio.
